 Save
Save The moment I opened the bottle of teal gel food coloring, a bold, almost electric scent hit me—nothing like the usual vanilla calmness. My friend was graduating, so a basic sheet cake wasn’t going to cut it. I remember debating how dramatic we could go, and after spotting rock sugar at the market, the geode idea crystallized. My kitchen looked like a jewelry studio by midafternoon, crystals sparkling everywhere. Even the neighbor popped in to ask if I was baking or mining.
I remember setting up for my sister's graduation party last spring—music blasting, laughter echoing from the living room, and me nervously brushing edible gold onto sugar crystals. It was the first time I'd attempted this kind of cake, and when everyone finally saw the geode reveal, their gasps made the hours spent worth every sticky hand.
Ingredients
- All-purpose flour: This is the backbone of our cake; measure carefully for a tender crumb.
- Baking powder: Ensures a beautiful rise, so don’t skip it or switch it with soda.
- Salt: Just a pinch to balance the sweetness and bring out natural flavors.
- Unsalted butter: Room temperature is essential—if too cold, the texture will be uneven.
- Granulated sugar: Cream it thoroughly with butter for that classic airy base.
- Eggs: Let them sit out before mixing; cold eggs make the batter curdle.
- Vanilla extract: Use pure vanilla for a deeper flavor, especially since the cake is not heavily masked by chocolate.
- Whole milk: Adds richness; don’t substitute for water or skim.
- Powdered sugar: Sift to prevent buttercream lumps.
- Heavy cream or milk: Start with less and add more as needed—the buttercream should be smooth but not runny.
- Teal gel food coloring: It holds up better than liquid coloring for vivid hues.
- Rock sugar crystals: Clear or white works best; color them yourself for that natural geode look.
- Edible gold leaf/luster dust: Gold details make the geode pop against teal. Luster dust is easier to apply with a paintbrush.
- Simple syrup: Optional, but brushing cake layers keeps them moist even after decorating.
Tired of Takeout? 🥡
Get 10 meals you can make faster than delivery arrives. Seriously.
One email. No spam. Unsubscribe anytime.
Instructions
- Bake the Vanilla Cake:
- Set the oven to 350°F and grease three 8-inch pans before lining with parchment—don’t rush this, or the layers might stick. Whisk flour, baking powder, and salt together, then cream butter and sugar till pale and fluffy.
- Mix Batter:
- Beat in eggs one by one, scraping the sides after each. Add vanilla, then alternate dry ingredients and milk, ending with flour; mix until just combined for a tender cake.
- Divide and Bake:
- Pour the batter evenly, tap the pans for bubbles. Bake 28–32 minutes; layers spring back when gently touched, and the air smells sweetly warm.
- Cool and Prep:
- Let cakes cool in pans for 10 minutes, then invert carefully onto racks—don’t force them out right away. Completely cooled cakes are easier to level and frost.
- Mix Buttercream:
- Beat butter until smooth, then gradually add powdered sugar and vanilla—go slowly, or clouds of sugar will fill your kitchen. Drizzle heavy cream until the buttercream is perfectly spreadable; tint most of it teal, leaving some white for a crumb coat.
- Color Sugar Crystals:
- Drop teal coloring onto sugar crystals, gently mixing for even color—patience pays off with deep, gemstone hues. Lay them out on parchment to dry so they don’t clump.
- Assemble Cake Layers:
- Level cakes and, if you wish, brush each layer with simple syrup for extra moisture. Stack with buttercream between each, then cover with white buttercream for a crumb coat; chill to set.
- Decorate Cake Surface:
- Smooth teal buttercream over chilled cake, using an offset spatula for sharp edges. Don’t stress about perfection—imperfections are hidden under decoration.
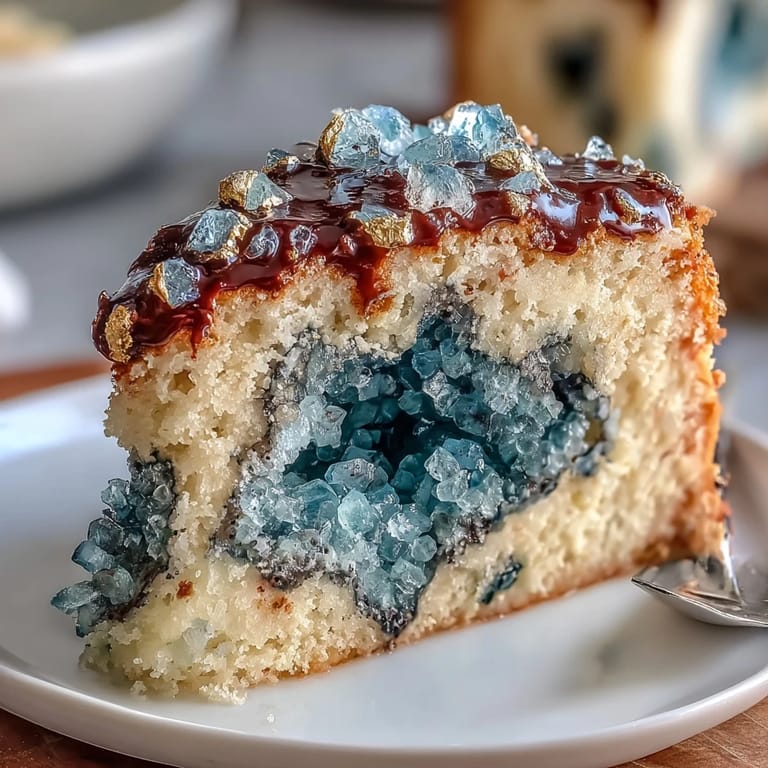
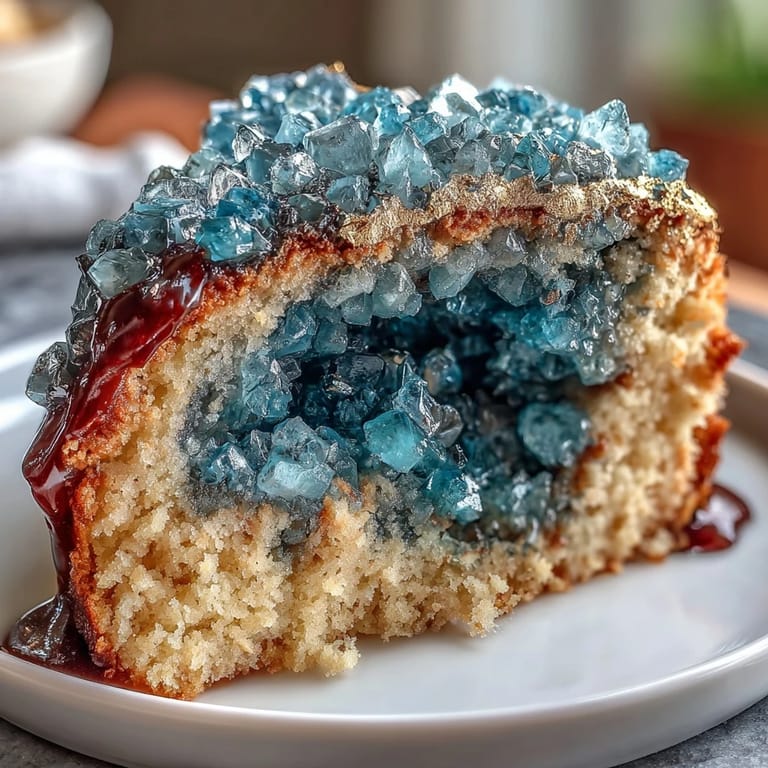
- Create Geode Slice:
- Use a serrated knife to carve a wedge from the side, revealing the cake’s inside. Spread buttercream inside the wedge, then carefully press colored sugar crystals into it, layering lighter crystals toward the center and darker at the edges.
- Add Gold Details:
- Paint gold leaf or luster dust with a small brush around the geode border for sparkle. If using luster dust, mix a bit with clear alcohol to create a paint-like consistency.
- Finish and Celebrate:
- Scatter extra gold accents and place a graduation topper if desired. Chill until ready to serve—don’t forget to step back and admire your handiwork.
 Save
Save When the cake was finally sliced for my friend's graduation celebration, everyone stopped mid-conversation. It wasn’t just dessert—it felt like the room suddenly had a centerpiece that people wanted to photograph and talk about.
Getting the Perfect Geode Look
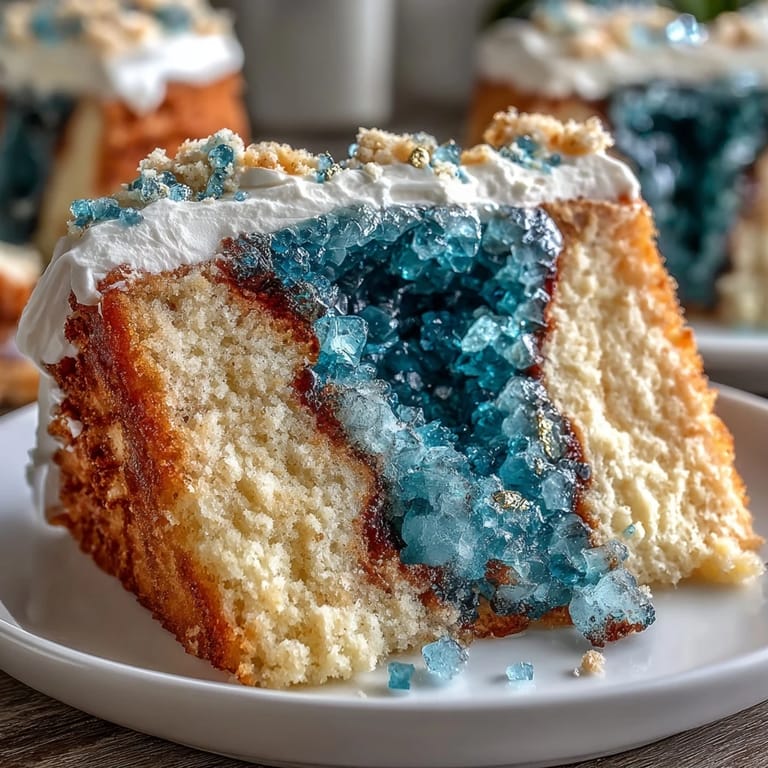
The magic is in the sugar crystal placement—layer lighter, almost translucent crystals in the center and deepen the shade as you move outward. Once, I rushed and mixed the colors too quickly, ending up with an odd, muddy hue, so patience really is key here.
Buttercream Texture Troubles
Butter that's too cold or powdered sugar that’s not sifted can totally sabotage smoothness, so make sure both are at room temperature and silky. I like to whip the butter for a few extra minutes beyond ordinary—sometimes my mixer sounds like applause when it’s ready.
Decoration Strategies for Special Occasions
If you want the cake to shine for an event, set up your workspace like an artist: lay out sugar, gold, and tools before you start decorating. A calm, clean setup helps avoid panicked gold leaf mishaps, which happened to me once when I almost glued my fingers together!
- Let the sugar crystals dry fully before using to prevent bleeding onto buttercream.
- Stack cake layers precisely or use cake dowels if needed for extra stability.
- The cake tastes best the day it’s made, but you can refrigerate leftovers for two days.
 Save
Save This cake isn’t just a showpiece—it’s a fun project that invites creativity and celebration. Every graduation should have a cake this memorable.
Recipe Questions & Answers
- → How is the geode design created?
After carving a wedge into the cake's side, teal-tinted sugar crystals are pressed onto buttercream to mimic geode formations.
- → What gives this cake its striking colors?
Teal gel food coloring is used for buttercream and sugar crystals, while gold leaf or luster dust adds metallic highlights.
- → Can the cake flavors be customized?
Yes, lemon or almond extracts can be added to enhance the classic vanilla flavor profile of the cake base.
- → How many servings does this cake provide?
The assembled cake yields about sixteen generous slices, perfect for group celebrations.
- → Are there any allergen concerns?
It contains wheat, eggs, and dairy. Some sugars or coloring may carry nut traces, so check packaging details.
- → What is the difficulty level?
Medium difficulty, requiring standard baking equipment and some decorative skills for the geode effect.