 Save
Save My cousin called me in a panic two days before her graduation, asking if I could whip up something special for her party. I found myself at midnight, scrolling through decoration ideas, when I realized that graduation cap cookies could be the perfect edible tribute to her achievement. The moment she bit into one and the buttery crispness gave way to smooth royal icing, I knew this recipe would become a tradition for every milestone celebration in our family.
I'll never forget watching my friend Sarah's mom open the box of graduation cap cookies at the party. She got quiet for a moment, then laughed—not because they were perfect, but because they were so thoughtful. That's when I understood that these cookies aren't really about impressing people with your decorating skills; they're about showing up for someone's big moment with something made by your own hands.
Ingredients
- All-purpose flour (2 1/2 cups): This is your foundation, and sifting it before mixing helps prevent lumps that'll mess with your dough texture.
- Unsalted butter (3/4 cup, softened): Softened is key here—cold butter won't cream properly with the sugar, leaving you with grainy cookies instead of tender ones.
- Granulated sugar (1 cup): This sweetens the dough and helps create that crisp edge you want when they bake.
- Baking powder (1/2 teaspoon): Just enough lift to keep these from being dense little hockey pucks.
- Large egg: Binds everything together and adds a touch of richness to the dough.
- Vanilla extract (2 teaspoons for dough, 1/2 teaspoon for icing): Don't skip this—it's what makes people ask for the recipe because they can't quite place why they taste so good.
- Salt (1/4 teaspoon): Balances the sweetness and makes every flavor pop a little brighter.
- Powdered sugar (3 cups, sifted): The backbone of royal icing; sifting removes lumps that'll ruin your smooth finish.
- Egg whites or meringue powder: Choose egg whites for the most authentic royal icing, though meringue powder is safer if you're worried about raw eggs.
- Gel food coloring (black and yellow): Gel coloring is way more potent than liquid, so you won't thin out your icing trying to get a deep color.
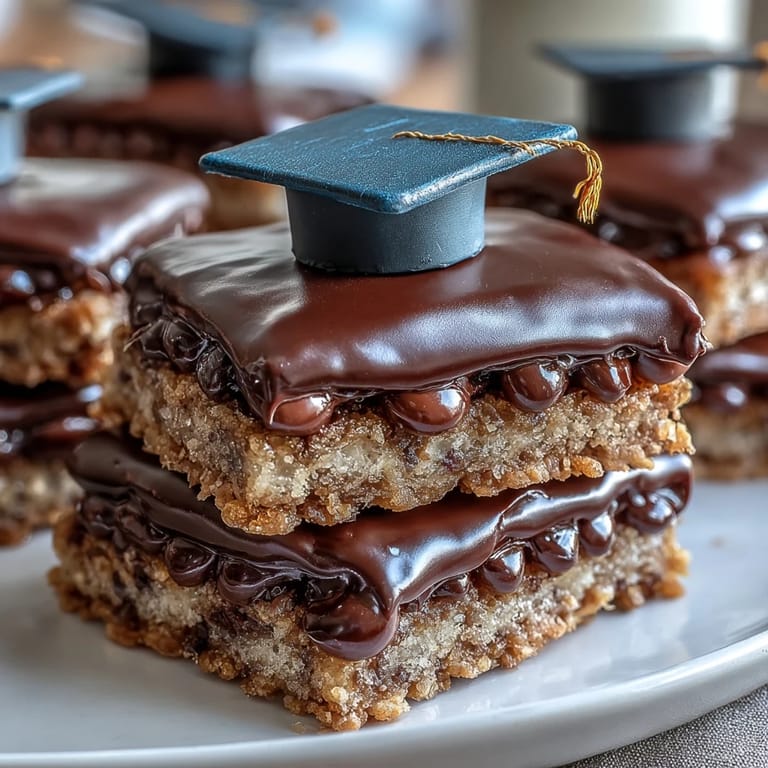
- Mini M&Ms or candy pearls: These are the crowning touch that makes each cookie look like a real graduation cap with a tassel.
Tired of Takeout? 🥡
Get 10 meals you can make faster than delivery arrives. Seriously.
One email. No spam. Unsubscribe anytime.
Instructions
- Whisk your dry ingredients together:
- In a bowl, combine flour, baking powder, and salt. This ensures the leavening is evenly distributed throughout your dough so you get consistent rise across all your cookies.
- Cream butter and sugar until fluffy:
- Beat them together for about 2-3 minutes until the mixture looks pale and light—this is when air gets incorporated, which makes your cookies tender rather than tough. You'll notice the texture changes from grainy to smooth.
- Add egg and vanilla to the creamed mixture:
- Mix until everything is combined, then gradually add your dry ingredients, mixing just until the dough comes together. Overmixing here is the enemy; you want to stop as soon as you don't see any white streaks of flour.
- Chill the dough:
- Divide the dough in half, shape each into a disk, wrap in plastic, and refrigerate for 30 minutes. This rest time is when the gluten relaxes and the flavors get to know each other, so don't rush it.
- Roll and cut your cookies:
- Preheat your oven to 350°F while the dough chills. On a lightly floured surface, roll the dough to 1/4-inch thickness and cut out graduation cap or square shapes. Place them on parchment-lined baking sheets.
- Bake until golden at the edges:
- Bake for 8-10 minutes—they should look slightly underbaked in the center when you pull them out, because they'll continue to firm up as they cool. The edges will turn a light golden brown, which is your signal they're done.
- Cool completely before decorating:
- Let the cookies sit on the baking sheet for a few minutes, then transfer to a wire rack. They need to cool entirely, which usually takes about 30 minutes, or your royal icing will melt right off.
- Make your royal icing:
- Beat egg whites (or meringue powder mixed with water) until foamy, then gradually add sifted powdered sugar, beating until you have stiff, glossy peaks. This takes about 5 minutes and you'll feel the resistance increase as you beat.
- Tint and adjust your icing:
- Divide the icing into portions, add black gel coloring to most of it, and yellow to a small portion. Adjust consistency by adding water for flooding (thinner, spreadable) or more powdered sugar for piping (thicker, holds its shape).
- Outline and flood each cookie:
- Using a piping bag with a thin tip, pipe a black outline around the cap shape, then use a toothpick to gently spread the icing toward the edges. This creates a neat, even finish.
- Let the base layer set:
- Wait 30-60 minutes for the black icing to fully set before adding any details. This prevents colors from bleeding into each other.
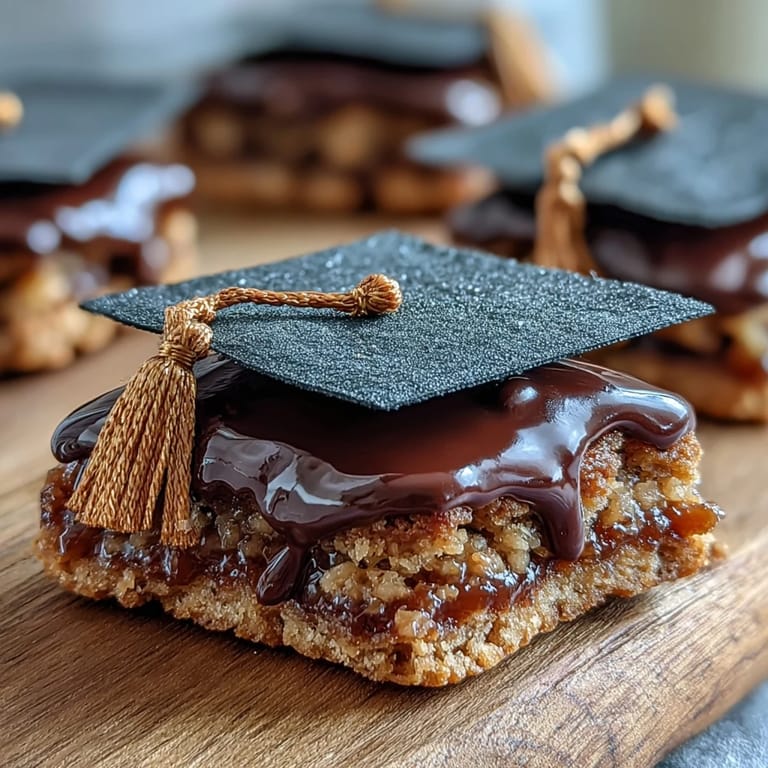
- Pipe on the tassel and button:
- Using yellow royal icing and a small round tip, pipe a little tassel on the side and a button on the top of each cap. These details are what really make it look like a graduation cap.
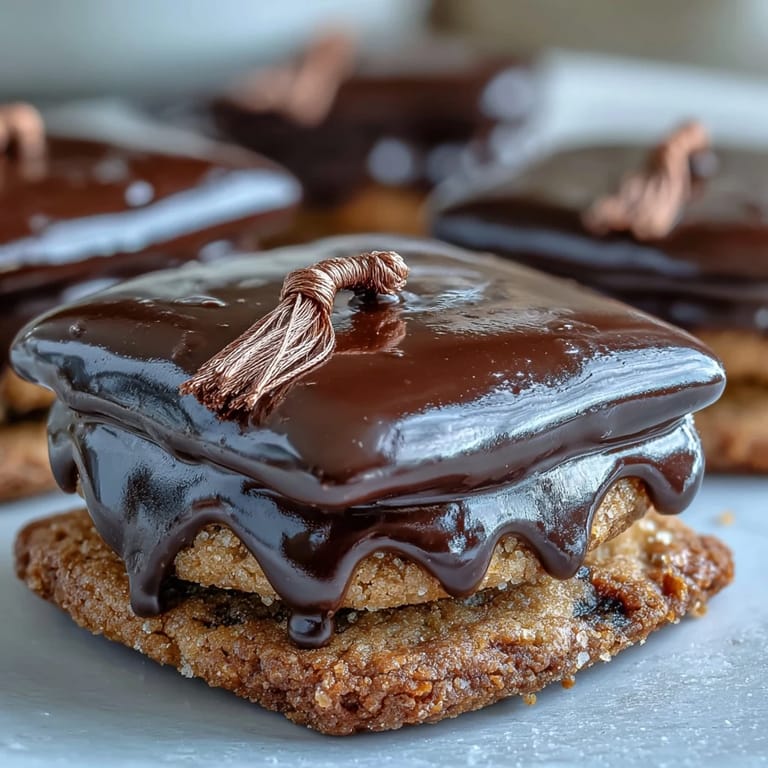
- Add the finishing touch:
- Place a mini M&M or candy pearl at the end of each tassel. Let everything dry completely—several hours or overnight is best—before serving or packaging.
 Save
Save I made these for my nephew's promotion party last spring, and watching a room full of adults get genuinely excited about cookie decorating reminded me that food really is just an excuse to celebrate together. By the end of the night, people were asking for extras to take home, and someone had already taken a photo for Instagram.
Timing Your Baking and Decorating
Here's something I learned the hard way: bake your cookies at least a day before decorating if you can. When they've had time to set and their flavors have settled, they're sturdier and taste better. Plus, it takes the pressure off trying to rush from oven to decoration in one day. If you're making these for a specific event, bake on day one, decorate on day two, and you'll actually enjoy the process instead of white-knuckling it.
The Secret to Perfect Royal Icing
The consistency of royal icing is everything, and it took me three batches to figure out the right ratio. For flooding (filling in large areas), your icing should be thin enough to spread easily with a toothpick but thick enough that it doesn't run off the cookie. For piping details like tassels and buttons, it needs to hold its shape without being so stiff it clogs your piping bag. Keep a small bowl of water nearby and add droplets very slowly—it's way easier to thin out thick icing than to thicken it back up.
Storage and Gift Giving
These cookies stay fresh and beautiful for about a week in an airtight container, and honestly, they ship better than almost any baked good I've made. The royal icing hardens into a protective shell that keeps the cookie fresh inside. I've packed these in tissue paper, tucked them into boxes with a handwritten note, and sent them across the country—they arrive looking like they just came out of your kitchen.
- Layer cookies between parchment paper in a sealed container to prevent moisture loss and icing damage.
- Keep them away from humidity and sunlight, which can cause the icing to sweat or fade.
- Pack them at least a day after decorating so the icing is completely set and won't transfer to other cookies.
 Save
Save These graduation cap cookies have become my go-to gift for every milestone, and they never fail to make someone feel seen and celebrated. There's something beautiful about turning sugar and butter into a edible memory of someone's big moment.
Recipe Questions & Answers
- → What is the best way to achieve smooth royal icing?
Beat egg whites (or meringue powder with water) with powdered sugar until stiff, glossy peaks form. Add vanilla and adjust water for consistency.
- → How do I prevent the cookies from spreading too much during baking?
Chill the dough thoroughly before rolling and cutting. Also, keep thickness steady at about 1/4 inch to retain shape.
- → Can I use natural food coloring for the icing?
Yes, gel food coloring can be replaced with natural alternatives but it may affect the vibrancy of the colors.
- → How long should the decorated cookies dry before packaging?
Allow the icing to dry completely for several hours or overnight to ensure decorations remain intact.
- → What tools are essential for decorating these cookies?
Use piping bags with small round tips, toothpicks for spreading icing, and a graduation cap cutter for shaping.